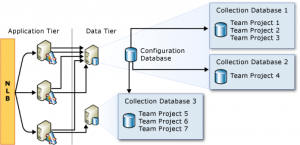
 When your Team Foundation Server (TFS) hosts multiple team projects, you can manage them more efficiently by grouping them together and assigning the same resources to them. A group of team projects is called a Team Project Collection.
When you install TFS, a default collection (DefaultCollection) is created to contain all Team Projects. When you create a collection, you specify the logical and physical resources that team projects within that collection can use. All the artifacts and data that those team projects use are stored in the single database of the collection.
This article describes the basic setup and configuration of a new Team Projekt Collection using a Microsoft Team Foundation Server 2015 Express (German).
Please note that must have administrative privileges to perform some of the following steps.
How do I do that?
Step 1: Create own Windows Group
- Run Computer Management Console (
compmgmt.msc) as administrator. - Select [Computer Management (local) > System > Local Users and Groups > Groups].
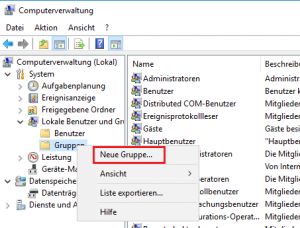
- Select action [New Group…] to start adding a new group.
- Enter a [Group Name] – i.e. Developers.
- Optionally: enter a [Description] – i.e. Group used as TFS users and administrators.
- Press [Add…] to add members to group.
- Search and select all users which should have access to TFS collections and projects; afterwards press [OK] to continue.
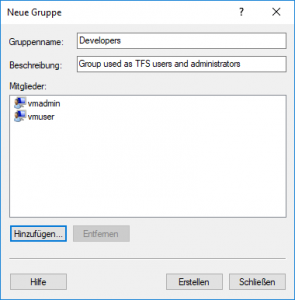
- Press [Create] to create the group and [Close] finish the process.
Step 2: Create new TFS Team Project Collection
- Run TFS Management Console (
TfsMgmt.exe). - Select [{tfs-server-name} > Application Tier > Team Project Collections].

- Press [Create Collection] to start creation process.
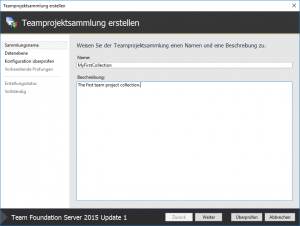
- Enter [Name] and [Description] for the collection to be created; press [Next] to continue.
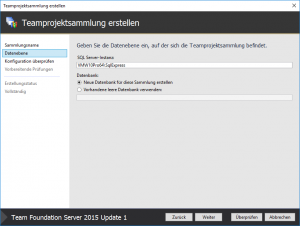
- Take over prefilled settings for [SQL Server Instance] and [Database]; press [Next] to continue.
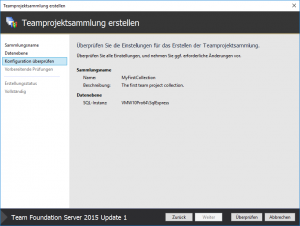
- Confirm settings by pressing [Verify].
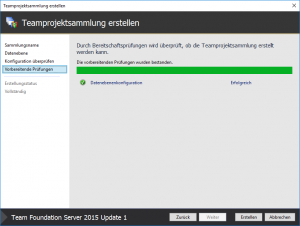
- Press [Create] to create the collection and [Next] to continue.
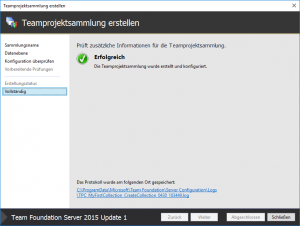
- Press [Close] to finish the process.
- Enter [Name] and [Description] for the collection to be created; press [Next] to continue.
Step 3: Assign Authorizations to new TFS Team Project Collection
- In TFS Management Console select [{tfs-server-name} > Application Tier > Team Project Collections > MyFirstCollection].
- Select [Common] and press [Group Membership].
- Optionally: Make the members of the Windows group Developers to administrators of this collection:
- Select entry [**Project Collection Administrators] in Groups list and press [Properties…] to start assignment.
- Select option [Windows User or Group] and press [Add…].
- Search and select the group Developers; afterwards press [OK] to add the group.
- Press [OK] to finish.
- Make the members of the Windows group Developers to users of this collection:
- If, as described above, the members of the Windows group Developers have already been administrators of this collection, no further steps are necessary, because collection administrators are automatically also users of the collection.
- If the members of the Windows group Developers are not administrators of this collection, but only users of the collection, follow the steps for the [**ProjectCollection Valid Users] entry in Groups list.
- If desired, proceed as well for Build Administrators ([**Project Collection Build Administrators]) and Build-Service Accounts ([**Project Collection Build Service Accounts]).
- Press [Close] to finish the process.
What has just happened?
A new Team Project Collection MyFirstCollection was created and can be access using http://{Computername}:8080/tfs/MyFirstCollection/ . The necessary database was created in MS SQL Server Express and runs under the local SQL Server Instance named {Computername}\SqlExpress.
What has just happened?
Set up the connection to the new Team Project Collection in Visual Studio and create new Team Projects for it with Visual Studio.


